Showing posts with label crafts. Show all posts

Monday, June 2, 2014

Easy business card holder


I'm a fairly social person, who is just in the beginning stages of my business, and I am making A LOT of contacts. I noticed that I either didn't have any of my cards on me or I had to dig through a purse full of Target receipts to get to them. Really professional, right?

Oh, one more quick thing about me...I'm cheap...err...frugal:)

So I looked through one of our junk drawers (I have two because I am an overachiever, don't hate) and found an old bandaid holder. Voila, instant business card holder. It happened to be Super Mario Brothers, which is totally rad in itself, but not my thing. 


So here is what I used:

Bandaid holder-metal
Gold or silver sharpie (optional)
Scrap paper
mod podge


I had to use a metallic sharpie since my bandaid holder top was curved and hard to cover with paper. So I decided instead of leaving it blue I could quickly paint it. 

If you are not rushed, you could spray paint the whole tin. That would look truly professional. I quickly colored the blue parts with the gold sharpie, and it looks amazing! 

After you are done painting any exposed metal, cut your scrap paper to size. 

Once your paper is cut, simply mod podge it onto your tin. Be sure to smooth out any bubbles and give it a nice even top coat. 

Let dry and you are finished! 


Friday, April 18, 2014

Ugly outlet cover solution

I came up with this idea awhile ago, and I made mental note to put this in my "invention notebook", the one that does not exist. I keep on meaning to write down all of my genius ideas, but they are so fleeting, and I always forget:)! Anyway, this was one of those ideas.

That outlet is ugly, cream, and right in my face.
See, it may seem like nothing to most, but my counter height electrical outlets drive me nuts. I often find myself plugging in those small wall wax warmers just to stick something in them.

Then I thought, "why not a picture frame?".  I thought of using a frame with an outlet plug cover to jazz things up.

A quick trip to the Dollar Tree was in order to gather my supplies. I needed a lightweight 4x6 picture frame, lightweight and cheap!
This is what I decided on. Pretty basic.


Back view
 Next I removed the cheapo stand, a quick pull and it was gone, leaving a nice flat back.

Photo stand removed
 I then held my frame up to the wall outlet to see where I should position the outlet cover (that we all have leftover from when our babies were sticking their fingers where they shouldn't).
Position and THEN glue
 I then simply hot glued the outlet plug onto the back of the frame, and there you have it!


Add a photo!

Add a printable (I have a chalkboard "You Are My Sunshine" print in this picture)


Easily use it as a dry erase board. Just insert plain or patterned paper into the frame and use a dry erase marker in the glass!
Hope you enjoyed this easy project!

Sunday, February 23, 2014

Back at it

Well, I am back after a wonderful break. My youngest is in kindergarten now and I have a bit more time for fun and creative outlets. Next year she will be in school FULL TIME and I decided now is my time.

Make it happen. 

Have fun while doing it.

Do what you love, what you enjoy. 

Yep, I can do that! 

I figured, why wait? I've had experience and feel confident enough now that I can make this into something. I mean, I have been thrifting long before Macklemore told me it was cool. I already wore my grandma's clothes, costume jewelry, loved her style. I adore an estate sale, and not to resell things, but for the stories they tell. I love seeing the potential in old furniture, or decorating with unusual found objects.

I also love creating. Pinterest has been the best and worst thing to happen to me since I joined 6 long years ago. I know many of you agree with me. I've had more "I can do that!" moments than I can count, and I can also blame that same site with the 5 pounds that won't leave, despite all of my fitness inspiration pins:).

So follow me on this journey! You can expect many crafty tutorials, pictures of my vintage and antique finds, along with pictures of pieces I am refinishing and selling.

Oh, and while you are here, check the links on the left to follow me on Instagram, Pinterest, and Facebook!

Tuesday, November 2, 2010

Burlap love

Thanks to Full of Great Ideas I found a way to use up my stash of burlap, and can I tell you that I am in love with this stuff?! Yes, that itchy cheap material is on my current favorite list.

For starters, did you know that you can put this in your printer with the help of some freezer paper??? Yes, burlap, in your printer. You heard me right.

Iron the freezer paper onto the burlap, shiny plastic side touching the burlap, on medium heat with no steam. Iron until the paper sticks to the burlap. Then cut the burlap and paper to standard printer paper size, 8.5x11. After that you print and you're done! So easy and fun, I see many more projects in my near future. A banner perhaps?

Anyhow, on a whim I decided to repaint my bathroom and needed some decor. I printed off onto burlap the definition of bathroom, then mounted it onto scrap foamboard I had around. I put some beadboard wallpaper on the foamboard and placed it into a spare frame (painted in oil rubbed bronze, of course). The tacks that hold the burlap onto the foamboard have buttons glued on them. The flowers are twisted and hotglued muslin, satin ribbon, and more burlap. The black flower is adorned with my grandmother's earring. It gives it a little flair!

I am also sharing the word doc link if you want to print a bathroom sign out for yourself:)! Click here.


Then I decided to print up this, mounted again on beadboard wallpaper, for a friend's new baby. Isn't it great?


So get your burlap out and get to making some for yourself or for gifts! They are sure to be well received!

I also added this to the following parties:


BWS tips button

http://www.thegypsyscorner.com/

Super easy headband

The other day a good friend of mine showed up with a super cute headband. I loved it, and then loved it more when she showed it to me. A piece of elastic tied, or sewn, around your head and a clip on earring attached. Voila! Absolutely perfect for a gal like me, that has a collection of my grandmothers earrings just waiting to be shown off.

Have I mentioned how hard it is for me to get a decent picture??? Oh well, I try:).

So grab your stash of earrings, brooches, really any jewelry and get festive!

Wednesday, September 22, 2010

Embroidered handprint art

I wanted to embroider something small for the longest time. I am not an expert, but I do find it therapeutic. There is something about sitting there with a hoop, needle and thread that is so soothing for me. I wish I had more ideas in my head as far as embroidering because I can see myself doing this quite a bit on fall nights.

Here is the idea that I had and it turned out beautifully. Which I realize I say pretty often on here. Which I guess makes sense because why would I post about all of the half-butt projects I messed up through the years or only half finished?

Anyway, I digress. Here is the art...it speaks for itself.

Thursday, September 9, 2010

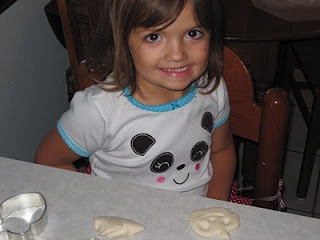
Fall salt dough

We are trying to do a lot more crafts these days. The youngest is just getting to the point where she is not trying to eat everything that we put in front of her face. Ok, so she tried to eat this as well but quickly figured out that it wasn't cookie dough:)

PS, when you are done, put these somewhere where your husband won't take a nice big bite and chip his tooth. I speak from experience. 

Here is the recipe:

2 cups all-purpose flour
1 cup salt
1 cup cold water

Mix together, adding more flour (if too sticky) or water (if too crumbly). 

If making ornaments add a hole to the top before baking! Learned this the hard way.

Bake at 200 degrees for an hour or more. With the pumpkins we made it was closer to 2 hours at 200. You can see the dough dry out as it cooks, so this was not as hard to gauge as I thought it might be. 

Finally paint and finish with a coat of laquer. I used good old Mod Podge.
Can you tell which ghost I let Charlotte paint? 


Matilda thought standing on the table was great!
Making footprints for our ghosts!
Charlotte loves any craft!
She also likes documenting these fun times with her camera:)
Leaves, acorns, pumpkins and ghosts!


I can see us making these all the time! I love that it is an easy way to get footprints and handprints to cherish through the years.