Tuesday, August 31, 2010

Magnetic picture frame/ holder

Finished frame! Adore!

I LOVE this!!!! Well, not only do I love this, I am slightly obsessed with this. I hope that my obsession will last until Christmas so that I can give these out as gifts. Ok, no way that is happening, I have crafters A.D.D., no doubt. But there are bound to be some gifts that need to be given between then and now:)

Want to make your own? Here is what you need to do it! A lot of these steps can be avoided of course, like there is no need to stain OR poly if you aren't feeling it.

The list:

Wooden plaque- around 9x7
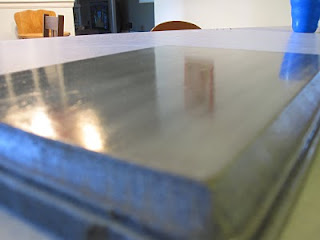
Sheet metal- I found this in my husbands shop but I saw it at Home Depot as well for less than $5 for a sizable sheet. You could easily make 10 of these with one sheet.
Tin snips- Or metal shears, less than $10.
Paint- Cheap acrylic works just fine.
Stain, and poly- completely optional but I think ebony stain always looks nice.
Liquid Nails- or some other really strong glue.

Start with your unfinished plaque
Paint it with your choice of paint and let dry.

Lightly sand and stain if desired.
Wipe off the stain, add another layer if desired.
For Pete's Sake WEAR GLOVES! Go and buy yourself a cute pair:)
And pay attention to the nearly 2 year old sitting right in front of you the entire time drinking your iced coffee!
Poly if desired, and you have the patience and time to let it dry.
Cut your metal to fit, mine was a bit over 5x7.
Use Liquid Nails to affix the metal to the plaque.
 Add weight to the top and let sit to dry.
And...drumroll please...the finished product!

The holder is from Hobby Lobby, 50% off so I think it was $2.50. The ribbon I had on hand from my monogram door hanger. The magnets I made! The wood button I had left over from when I made my own wooden buttons, the 2 flowers are coverted from vintage earrings I had lying around, and the glass magnet I made from magazine clippings. I may put a tutorial up on magnets too, although I am pretty sure most know how to do this and I was the last to figure it out!

Oh, and come tomorrow there is an even EASIER version of this so keep an eye out for that!

What do you think?

Monday, August 30, 2010

The too easy earring holder

So I have been looking for a nice looking easy way to display my earrings. I was inspired by the numerous radiator and chicken wire frames that are out there and decided to search my craft room and raid what I already had instead of buying more stuff. So lets get to it.

Here is what you will need:

Embroidery hoop (I used a 12 inch one, which cost me $.99 at the thrift store years ago)
lace or a doily (I found an old table runner at the thrift store for a dollar)

No real instructions, just place the lace/ doily inside the hoop and pull tight. Snip the excess material and fabric glue it around the back if you like.

A nice touch would be to paint the hoop as well, I like it bare so that I can always reuse it for its original purpose later in life:).

Oh, and aren't those earrings the cutest??? I made them and I think they are my most treasured pair. I can work on a tutorial for that too if anyone likes.

This was also linked to the Metamorphosis Monday post on Between Naps On The Porch!

Retro garage sale light revamp

It started with this light. I saw it at a garage sale marked $15 and for $10 it was mine! I loved it, the little one loved, the husband...not so much:) Haha.

I thought about keeping it blue and putting it in the kitchen which currently (note I said currently, this could change with a whim) is blue and red retro kitch. Alas I am a kind-hearted woman and let my daughter have it! A few coats of spray paint and it was ready for her room.

Here was her old one, which went with her vintage nursery rhyme theme. Very adorable but no longer suitable for a 4 year old "big girl".
So I took it down and began a solo trip down my path to becoming an electrician. Yep, you read that right, I began to hang this myself, my husband wasn't even at home! That's confidence.

First I had to realize that I have some very gross 1978 popcorn ceilings, which I knew I guess. I just avoid looking up at them until I have to. Like today. Then I notice the ugly dirt ring which just means another trip to Home Depot was needed for a ceiling medallion. 

Followed by my staring at the ceiling and trying to figure out my plan of attack. Trust me I was laughing at myself and possibly throwing out some "oh fudge"'s. But I got it up there! It was trial and error and I had to use some painters tape to hold some things in place, but it works!
And once the cover went on along with the beads, it is perfect!
It looks so great in her room and I think she likes it too!
In Charlotte's words "Mama, how romantic! I really love that you made that for me!". Yes, she is a pretty cool kid!

PS, I linked this great find on Rhoda's page over at Southern Hospitality

Sunday, August 29, 2010

Moss covered monogram- tutorial

I love how this turned out...and I love the price even more. The whole thing cost me less than $5, thank you Dollar Tree:).

Here is what you will need:

*12" letter- mine was from Hobby Lobby and was $1.99, near the unfinished wood products.
*paint- I used spray paint, Krylon's oil rubbed bronze.
*Spanish moss sheets- from the Dollar Tree. I used 2 sheets.
*Ribbon of your choice- for the letter shown I used 48" total, 24" on each side. The Dollar Tree has this too!
*Hot glue gun

Step 1:
Paint your blank letter and let it dry.

Step 2:
Get out your moss sheet and dry letter.

Step 3:
Cut the moss in the shape of the letter. I needed two sheets due to the width of the "M". I would imagine other letters may only needs one sheet. Now learn from my mistake. I put the moss under the letter and free cut around the letter. The BETTER way to do this would be to hot glue the sheet(s)to the front of the letter then turn it over and cut around it. Duh!

Step 4:
Examine the back of the letter and trim as needed.

Step 5:
Attach the ribbon. Fold over first then glue pretty side up on the back of the letter. You are going to want to glue the ribbon near 45 degrees to avoid puckering once the bow is tied.

Step 6:
 

Hang it on your door (or anywhere) for all to admire!

Thursday, August 26, 2010

Laundry room makeover

Not much smells better to me than a nice fresh coat of paint. Therefore I paint. I have been gravitating towards browns and blues for the past few years since they are calming colors for me. Trust me, I was a stressed out mess for the few years that my kitchen was a bright yellow! So with all of the leftover paint I have collected the laundry room was first on my list.

Here is the before, it was pretty bad...:


And here is the after:
I found the old wash board at a yard sale and had the Good Housekeeping magazine print done up at Costco (frame from Goodwill) from a high resolution image I found online. Cheap and fitting artwork, my favorite! Oh, and the cabinets were a Craiglist find, one that wound up being right down the street from us, which sure did make for easy transport!

And that drying rack??? I made it! Thanks to Centsational Girl and her tutorial! Sure it is wonky and imperfect, but I made it!!! I drilled holes and cut dowels and sanded and painted and all got to use my husbands shop! It was fun and I am proud of it, especially the bowed out bars and the extra holes that needn't be drilled. And the pegs on the bottom are a great place to display our vintage umbrella collection.

I think it needs a fun vintage light fixture now...yes, I am positive that is what it needs!

Off to finish up some laundry now.

Why is a good hall table SO hard to find?

I am a thrift shop and garage sale lover, and always had the best of luck when it came to finding nearly anything. When I was looking for an oversized wooden fork and spoon set, found it on the first trip. Trying to find an old tole chandelier? Scored. Old blue onion Corelle dishes? Yep, I own the full set now. But just recently I have been looking for an entry table, something relatively small in depth but fairly wide. Not too wide though, they can't interfere with our lovely bi-fold closet doors, circa 1978 (if I only had the nerve to take a hammer to those). I did find one vintage table that would've been perfect, but someone decided to paint a lovely beach scene on the top and a delightful faux sand finish over the whole table...not something I wanted to spend the next 10 years scrapping and sanding off!

Then yesterday I came upon this table:
I go back and forth between loving it and looking at it like an old television cabinet or submarine hole. I just don't get what that hole is for? I put some of my old books in there and I think it looks nice, but I am still not sold. Maybe someone out there can give me some tips on what to do with this!? I am either going to paint it white and distress it or sell it on Craigslist.