

Supply list:
embroidery hoop- I used a 12 inch one
muslin or another thick cotton fabric
acrylic paint for the tree
Fine tip paint brush
Embroidery floss
Embriodery needle
Hot glue gun
Optional
Grosgrain ribbon for flowers (or fabric for leaves if you prefer)
Needle and thread for grosgrain flowers
Ribbon for hanging
Paint for embroidery hoop
 First you start with some muslin or other thick cotton fabric and an embroidery hoop. You can paint the embroidery hoop at this time or leave it until last (to decide how you like it once complete) like I did.
 Then using a disappearing ink marker I sketched out my tree, heart, and initials. To make the bark in the tree I took my marker and rolled it in my fingertips while drawing a line down. It worked great, so try practicing that "technique" on some scrap paper!

For the heart I used a basic running stitch using red embroidery floss.
For the initials I used a split stitch so that it looked a bit more polished.
Both stitches are really easy.
Below are examples of each stitch for you!
 | |||
| Running Stitch |
 |
| Split stitch |


Now it is time to begin painting your tree. I have an assortment of acrylic paints, the $1 paints at craft stores. I would have preferred brown for the tree but the room it is going in is blue and black so I needed a darker shade. I settled for a brown/ blue/ gray/ green that I mixed. Using a fine tip paint brush I traced my outline, adding few additional touches here and there:).
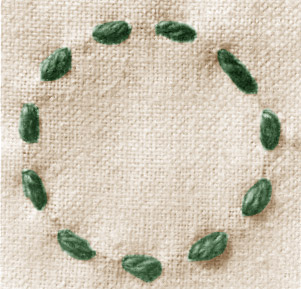
Deciding that it needed a bit more I thought I would add some fabric leaves or some embroidered hearts throughout. I ended up making some ribbon flowers that I am still not committed to, but I do love them!
 Take 4 inches of grosgrain ribbon and burn the ends to prevent from fraying.
Tie a knot at the end of your threaded needle and sew a running stitch at the bottom of the ribbon.
Pull that stitch tight to create a flower or yo-yo.
 |
| Notice the Emergen-C in the back. Yeah, I am sick. Awesomeness. |

The result...if I were brave enough to commit to these flowers! haha!
***Now is the time to paint your frame if you decide to or haven't painted it already!***
 | ||||
| Notice the pins in the back? Yep, that is me trying decide on the flowers! |
Pull your fabric tight and tighten your hoop screw.

Cut the excess fabric as you would trim a pie.


Oh, and a great part to the day? Seeing this in the mail!
 |
| How cute is she??? |
Anyway, I donated what I could to the walk that she participated in for Nella (her daughter born with Down's Syndrome) and I got this super sweet thank you letter from the Hampton's. Oh, and Nella thinks I am a rockstar which earns her a place on my fridge:)!

Linked to the following parties:


9 comments:
Um...no. Even with your tutorial mine would look like a drunk Michael J Fox did it. But I love it!
What a sweet project! Thanks for following...I'm following you back!
Love, love , live this adorable project. Guess I'll have to get busy on one for myself. Thanks for the inspiration!
Very cute! I do like the flowers, but I think I like the visual pop of the red initials all by themselves a bit more. I also like that you've included stitching photos for losers like myself that just grab a needle and start jabbing randomly.
Oh, and I followed! Thanks for following me :)
Thanks Anna for the advice. It is flowerless right now and I like it:)!
Very pretty, something about the beauty in the simplicity of this that I'm draw to. Thx for sharing. Lovin' what I see, I'm a new follower :)
Sharing on FB ...love
Mel - This is adorable! I featured this on the Sunday Showcase Round Up. Thanks so much for joining in the fun! Stop by and grab a featured button if you like. Hope you are enjoying your week ~ Stephanie Lynn
This is so, soo cute! I'd love for you to come link to this on my blog hop if you get a chance :)
Any chance you might be selling this adorable, customized artwork? I don't think I have the patience to complete the project.
Post a Comment