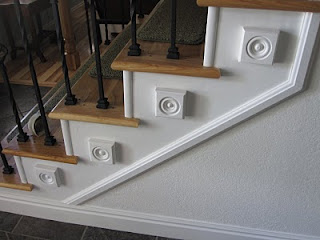
Okay, I am going to come off as a real tightwad, but guess what? This project was super cheap! It cost me a total of $6.50 and it looks so nice! I found these pre-painted accents at Home Depot near the molding and railing materials. Then just (nearly, as I am non-commital to decor) used some Liquid Nails and put them up. If you want a less permanent option, just hammer them in with a long nail. This way you can always remove them and simply fill in the remaining hole later.
So, here is the before and after. What do you think?
 |
| Before- not bad... |
|
 |
| After- Lookin good! |
And putting them up is simple, all you need is a hammer, a drill, a nail punch, nails, and wood putty.
 |
| Measure the positioning and make sure the accents are level and nail it in. I drilled holes in them first to prevent them from splitting. |
|
 |
| Use a nail punch and tap the nails in. | |
| | | | | | | | | | | | | | | | | | | | | | | | | | | | | | | | | | | | | | | | | | | | | | | | | | | | | | | | | | | | | | | | | | | | | | | | | | | | | | | | | | | | | | | | |
| | | | | | | | | | | | | | | | | | | | | |
|
|
 |
| Fill in with wood putty and then paint. |
|
Then enjoy!


3 comments:
Following you back and good luck for the giveaway!
I liked your last post!
You should link it up to parties. I have all the fun parties going on out there by days of the week on my blog :)
Hugs
Thanks! I am going to be sure to participate in more blog parties! Thanks for putting together the list!
PS, love your blog! :)
Hey Melissa, I just decided to start the blog thing back up again!!! I like the stairs, it's simple and looks good. Sometimes simple is best!!!!
Post a Comment